How to Install Undermount Sink to Granite: A Step-by-Step Guide
Installing an undermount sink to a granite countertop is a great way to add a sleek and modern look to your kitchen. However, it can be a bit challenging to install, especially if you don’t have any experience with plumbing or countertop installation. But don’t worry, with the right tools and a little bit of know-how, you can easily install an undermount sink to your granite countertop in just a few hours.
The first step in installing an undermount sink to a granite countertop is to shut off the water supply and remove any plumbing fixtures. This will ensure that you don’t accidentally damage any pipes or fixtures while you’re installing the sink. You’ll also want to have a bucket and a mop or rag handy to clean up any excess water that drips out during the installation process. If you have a garbage disposal installed, be sure to shut down the power and remove it as well.
Once you’ve removed the plumbing fixtures and shut off the water supply, you’re ready to start installing the sink. There are a few different methods for installing an undermount sink to a granite countertop, but the most common method involves using epoxy or silicone adhesive to secure the sink to the underside of the countertop. With a little bit of patience and some careful measuring, you can easily install an undermount sink to your granite countertop and enjoy a beautiful and functional kitchen for years to come.
Understanding Undermount Sinks
Definition of Undermount Sinks
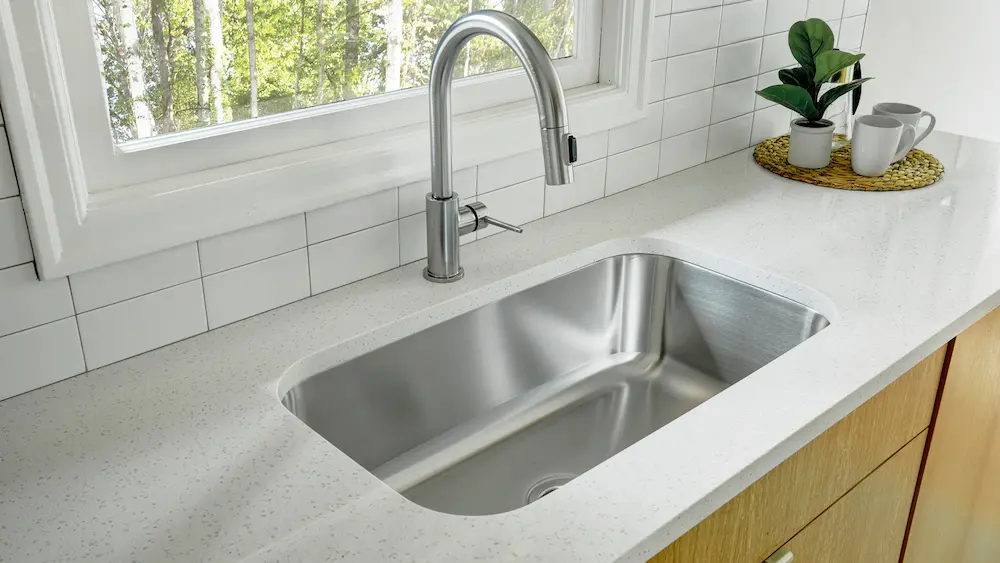
An undermount sink is a type of sink that is installed underneath a countertop. Unlike a drop-in sink, an undermount sink is mounted from below and does not have a lip that sits on top of the countertop. Instead, the sink is attached to the underside of the countertop using special mounting brackets.
Undermount sinks are typically made of stainless steel, porcelain, or composite materials, and are available in a variety of sizes and shapes. They are commonly used in kitchens and bathrooms, and are popular for their sleek, modern look.
Benefits of Undermount Sinks
One of the main benefits of an undermount sink is that it provides a seamless, clean look to your countertop. Since there is no lip or edge around the sink, it is easier to clean, and there are no crevices or seams for dirt and grime to accumulate.
Another benefit of undermount sinks is that they can be installed with a variety of different countertop materials, including granite, marble, and quartz. This makes them a versatile option for homeowners who want to update their kitchen or bathroom without having to replace their countertops.
Choosing the Right Undermount Sink
When choosing an undermount sink, there are several factors to consider. First, you will need to determine the size and shape of the sink that will fit your countertop. You will also need to decide on the material and finish of the sink, as well as any additional features, such as a built-in drainboard or a garbage disposal.
It is also important to consider the installation process for your undermount sink. While some sinks may come with mounting hardware included, others may require additional brackets or clips to secure the sink to the countertop. It is important to follow the manufacturer’s instructions carefully to ensure a secure and stable installation.
Overall, an undermount sink is a stylish and functional addition to any kitchen or bathroom. By understanding the benefits and choosing the right sink for your needs, you can enjoy a seamless, modern look that is easy to clean and maintain.
Understanding Granite Countertops
When it comes to installing an undermount sink on a granite countertop, it’s important to understand the properties of granite and the pros and cons of using it as a countertop material. In this section, I’ll break down the key information you need to know about granite countertops.
Properties of Granite
Granite is a natural stone that is formed from cooled magma. It is an extremely hard and durable material, which makes it an excellent choice for countertops. Here are some key properties of granite:
- Hardness: Granite is one of the hardest natural stones, which means it is resistant to scratches and dents.
- Heat Resistance: Granite is heat-resistant, which means it can withstand high temperatures without damage.
- Stain Resistance: Granite is naturally stain-resistant, which makes it easy to clean and maintain.
- Appearance: Granite has a unique, natural appearance that can add value to your home.
Pros and Cons of Granite Countertops
While granite countertops are a popular choice for many homeowners, there are both pros and cons to consider before making a decision. Here are some of the key advantages and disadvantages of using granite as a countertop material:
Pros
- Durability: Granite is extremely durable and can last for many years with proper care.
- Aesthetics: Granite has a natural beauty that can enhance the look of any kitchen or bathroom.
- Value: Granite countertops can add value to your home and may increase your resale value.
- Variety: There are many different colors and patterns available, which means you can find a granite countertop that matches your style.
Cons
- Cost: Granite countertops can be expensive, which may not fit everyone’s budget.
- Maintenance: While granite is relatively easy to maintain, it does require periodic sealing to maintain its stain resistance.
- Installation: Installing a granite countertop can be a complex process that requires professional installation.
- Weight: Granite is a heavy material, which means it may not be suitable for all types of cabinets.
By understanding the properties of granite and the pros and cons of using it as a countertop material, you can make an informed decision about whether it is the right choice for your home.
Preparation Steps
Before beginning the installation process, it is important to properly prepare the area to ensure a successful and long-lasting installation. In this section, I will discuss the tools and materials needed, as well as some safety precautions to keep in mind.
Tools and Materials Needed
To install an undermount sink to granite, the following tools and materials are needed:
| Tools | Materials |
|---|---|
| Power drill | Undermount sink |
| Hole saw | Silicone adhesive |
| Screwdriver | Mounting clips |
| Adjustable wrench | Plumbers putty |
| Jigsaw | Safety goggles |
| Measuring tape | Dust mask |
It is important to have all of these tools and materials on hand before beginning the installation process.
Safety Precautions
Safety should always be a top priority when installing an undermount sink to granite. Here are some safety precautions to keep in mind:
- Wear safety goggles and a dust mask when cutting or drilling into the granite to prevent dust and debris from entering your eyes and lungs.
- Use caution when handling power tools, such as the jigsaw and power drill, to prevent injury.
- Turn off the water supply and ensure that the plumbing fixtures are properly shut down before beginning the installation process to prevent water damage.
- Use caution when handling the undermount sink to prevent damage to the sink or injury to yourself.
By following these safety precautions, you can ensure a safe and successful installation process.
Installation Process
Installing an undermount sink to granite can be a challenging task, but with proper planning and execution, it can be done with ease. In this section, I will guide you through the installation process step-by-step.
Setting Up
Before you begin the installation, make sure you have all the necessary tools and materials. You will need a drill, a jigsaw, a silicone adhesive, a putty knife, a screwdriver, and a measuring tape. You will also need a sink template, which usually comes with the sink.
To start, place the sink template on the granite countertop and trace the outline of the sink. Then, using a drill, create a starter hole inside the traced line. Using a jigsaw, carefully cut along the traced line until the hole is large enough to fit the sink.
Securing the Sink
Once the hole is cut, place the sink into the hole and make sure it fits snugly. Then, apply a silicone adhesive around the edge of the sink and carefully lower it into the hole. Make sure the sink is level and centered before proceeding.
Next, use a screwdriver to secure the sink clips to the underside of the countertop. The clips should be evenly spaced around the sink and tightened until the sink is firmly secured to the countertop.
Sealing and Finishing
After securing the sink, use a putty knife to remove any excess adhesive from around the sink. Then, apply a bead of silicone caulk around the edge of the sink to seal the gap between the sink and the countertop. Smooth out the caulk with a damp cloth to create a clean, even finish.
Finally, let the caulk dry for at least 24 hours before using the sink. This will ensure that the caulk is fully cured and the sink is properly sealed.
In conclusion, installing an undermount sink to granite requires careful planning and execution. By following these steps, you can ensure that your sink is properly installed and ready for use.
Post Installation Tips
Congratulations on successfully installing your undermount sink to your granite countertop! Here are some post-installation tips to ensure that your sink stays in great condition for years to come.
Maintenance of Undermount Sinks
Proper maintenance is key to keeping your undermount sink looking and functioning like new. Here are some tips for maintaining your sink:
- Clean your sink regularly with a non-abrasive cleaner and a soft cloth or sponge to avoid scratches.
- Avoid using harsh chemicals or abrasive materials, such as steel wool or scouring pads, as they can damage the sink’s finish.
- Keep your sink dry when not in use to prevent water spots and mineral buildup.
- To prevent clogs, avoid pouring grease or oil down the drain and use a drain strainer to catch food particles.
Troubleshooting Common Issues
Even with proper maintenance, issues can still arise with your undermount sink. Here are some common issues and how to troubleshoot them:
- Leaks: If you notice water leaking from your sink, check the connections between the sink and the drain and tighten them if necessary. If the leak persists, it may be due to a damaged seal or gasket, which will need to be replaced.
- Stains: If your sink has developed stains, try cleaning it with a mixture of baking soda and water or vinegar and water. For tougher stains, you can use a specialized cleaner or a paste made from baking soda and hydrogen peroxide.
- Scratches: If your sink has scratches, you can use a fine-grit sandpaper or a specialized scratch remover to buff them out. Be sure to follow the manufacturer’s instructions and test the product on a small, inconspicuous area first.
By following these post-installation tips, you can keep your undermount sink in great condition and avoid common issues.