Easy Steps to Make Your Plastic Bathtub Sparkle Like New
Getting a plastic bathtub white again can seem like a daunting task, especially after years of soap scum buildup and hard water stains. I’ve been there, staring at a tub that’s lost its sparkle, wondering if it’ll ever look brand new again. But fret not, because I’ve discovered some foolproof, eco-friendly methods that’ll bring back the shine without harming the environment or your bathtub.
From natural cleaners like vinegar and baking soda to the magic of lemon juice, I’ve tried them all. And let me tell you, the results were surprisingly effective. So, if you’re ready to give your plastic bathtub a makeover, stick around. I’m about to share some simple, yet powerful ways to get your tub gleaming white once again, using items you probably already have in your home.
Introduction to Bathtub Whitening
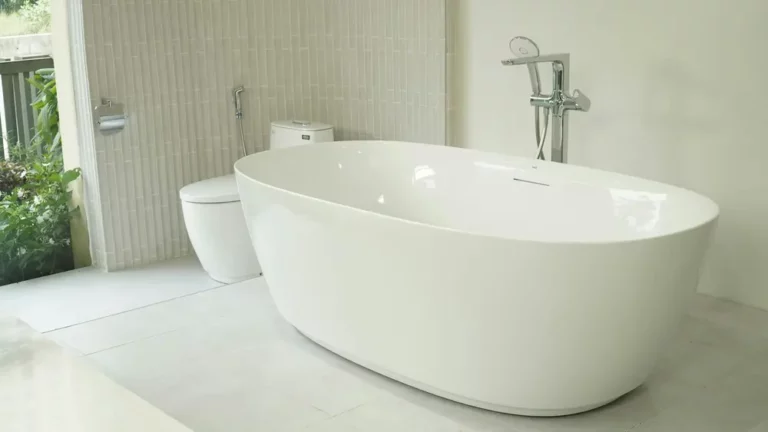
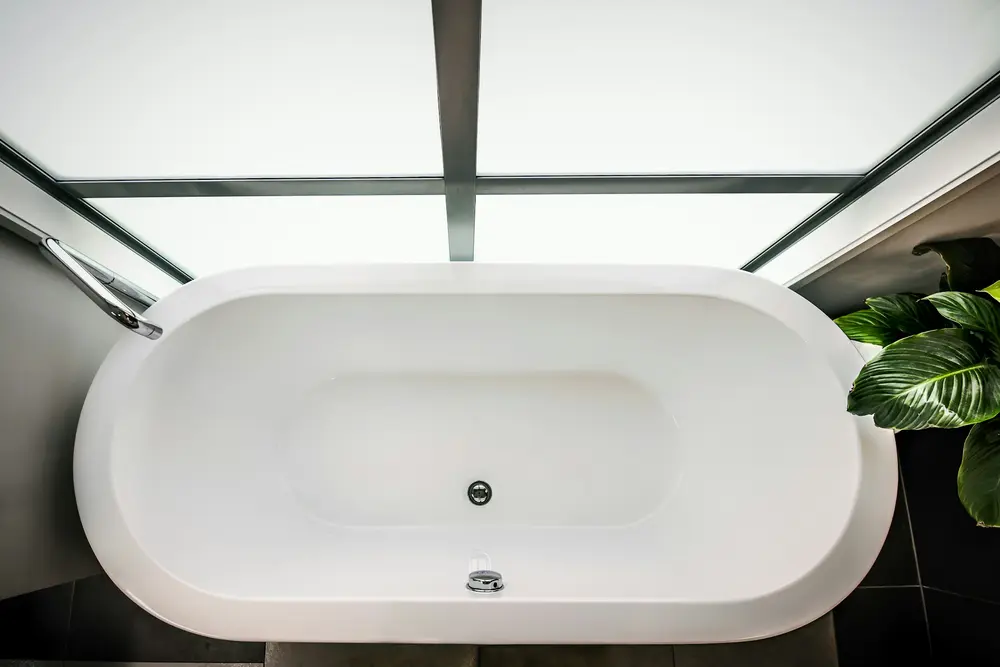
Stepping into a sparkling, white bathtub can truly transform a regular bath ritual into a rejuvenating experience. However, over time, plastic bathtubs can lose their luster and develop a dull, yellowish hue. This can be due to a variety of factors including the buildup of soap scum, the presence of hard water, and even just the natural aging of the material. But, here’s the good news: bringing back that original white gleam is possible without resorting to harsh chemicals or expensive professional services.
I’ve found that using eco-friendly materials not only supports a healthier planet but often yields surprisingly effective results. It’s quite empowering to realize that some of the most effective solutions can be found right in our kitchen cupboards. For instance, vinegar, an all-time favorite for DIY enthusiasts like me, works wonders on those stubborn stains. It’s fascinating to understand how these natural ingredients function – vinegar, for example, breaks down the gunk without harming the bathtub’s surface thanks to its acidic nature.
Moreover, for those more challenging stains, I’ve turned to a slightly stronger concoction of baking soda and hydrogen peroxide. This powerful duo can tackle almost anything thrown their way. But it’s crucial to remember that not all surfaces react the same way. While this combo works miracles on plastic bathtubs, acrylic ones might not be as forgiving.
I’ve also stumbled upon an intriguing method from the realm of retro electronics restoration. While primarily used for vintage computers and gaming systems, the process involves hydrogen peroxide and UV light, demonstrating the versatility and potency of hydrogen peroxide in restoring whiteness. However, it’s important to note the strength and composition of the peroxide solution, especially when using hair bleaching products, to avoid unwanted damage to the bathtub.
Natural Cleaning Solutions
When tackling the challenge of whitening a plastic bathtub, I’ve found that sticking to natural cleaning solutions can be both effective and environmentally friendly. Let’s dive into a couple of methods I’ve tested and recommend.
Vinegar and Baking Soda Method
The combination of vinegar and baking soda is a powerful duo that’s been a staple in my cleaning arsenal for years. It’s not just great for unclogging drains but also fantastic for combatting bathtub stains and restoring that pristine white finish. Here’s how I do it:
- First, I sprinkle a generous amount of baking soda over the surface of the bathtub. This acts as a mild abrasive that’s tough on stains but gentle on plastic.
- Next, I spray white vinegar over the baking soda. The mixture immediately starts to fizz and bubble, which is exactly what you want to see. This chemical reaction helps lift grime and stains from the surface.
- I allow this mixture to sit for about 30-45 minutes. This waiting period gives the vinegar and baking soda ample time to work their magic.
- After the time’s up, I grab a sponge and scrub the bathtub in circular motions. It’s rewarding to see the stains fade away as I go.
- Finally, I rinse the bathtub with warm water, ensuring all residue is washed away. The result is always a visibly whiter, brighter bathtub.
Using Hydrogen Peroxide
Another method I’ve seen remarkable results with involves hydrogen peroxide. Particularly beneficial for those stubborn, hard-to-remove stains, hydrogen peroxide works wonders. Plus, it’s an excellent alternative when you’re dealing with more than just surface grime. Here’s the process:
- I start by mixing a paste using hydrogen peroxide and baking soda. The consistency should be thick enough to cling to vertical surfaces without dripping off.
- I apply this paste directly onto the stained areas of the bathtub and let it sit until it starts drying out. This usually takes about an hour.
- After the paste has had time to dry, I lightly scrub the area with a soft-bristled brush or sponge. This step requires a bit of elbow grease, but it’s crucial not to use anything too abrasive that might scratch the plastic.
- Once satisfied with the scrubbing, I rinse the area thoroughly with warm water. Sometimes, it might take a couple of applications to completely remove the stain, but the improvement is noticeable right from the first attempt.
I choose these methods not only for their effectiveness but also for their minimal impact on the environment. Plus, the ingredients are likely already in your kitchen cupboard, making them convenient and cost-effective.
Chemical Cleaning Options
When tackling the task of making our plastic bathtubs shine bright white again, sometimes natural remedies might not cut it, especially with stubborn stains that have built up over time. That’s when I turn to chemical cleaning options, which, when used carefully, can bring back the sparkle without causing damage.
Choosing the Right Commercial Cleaner
Before you head out or hop online to grab a commercial cleaner, it’s crucial to select the right product. Not all cleaners are safe for plastic surfaces, and the last thing I want is to ruin the finish of my tub. I always look for cleaners specifically designed for plastic or acrylic bathtubs. These products are formulated to deal with soap scum, hard water stains, and general dinginess without scratching or etching the surface. It’s always a good practice to read the label for any safety instructions and to test the cleaner on a small, inconspicuous area of the tub first. Doing so ensures that it won’t cause any damage or discoloration.
Addressing Stubborn Stains with Chlorine Bleach
For those times when I’m faced with relentless stains that just won’t budge, I’ve found chlorine bleach to be my ally. However, it’s important to use it with caution. Mixing bleach with other cleaners can lead to dangerous chemical reactions, so I always make sure to use it by itself and in a well-ventilated area. Here’s my step-by-step process for using bleach safely:
- Dilute the bleach with water, following a ratio of one part bleach to four parts water. This mixture is strong enough to tackle stains but gentle enough to minimize the risk of damage to the plastic.
- Apply the solution directly onto the stains and let it sit for no more than 10 minutes. I’ve learned that allowing it to sit longer doesn’t increase its effectiveness and can potentially harm the bathtub’s surface.
- After letting it work its magic, I scrub the area gently with a soft-bristled brush. Hard brushes or scrubbing pads are a no-go as they can leave scratches.
- Rinsing thoroughly with warm water is the final step, ensuring that no bleach residue is left behind that could irritate skin during the next bath.
Remember, patience and regular maintenance are key to keeping a bathtub looking new. Chemical cleaners are powerful, but they should be seen as a part of a larger cleaning routine rather than a one-stop solution.
Routine Maintenance and Prevention
Maintaining a white, clean bathtub doesn’t just stop at a thorough cleaning. It’s about incorporating daily habits and prevention methods to ensure the tub stays in its best condition for years to come. Let me walk you through some of the practices I’ve found incredibly useful.
Daily Cleaning Practices
I’ve learned that consistency is key when it comes to keeping my plastic bathtub looking new. Every day, after the last shower, I take a few minutes to rinse the tub with warm water. This simple practice washes away soap scum and body oils before they have a chance to settle. Once a week, I take it a step further by wiping the tub down with a gentle, non-abrasive cleaner. It’s important to avoid harsh chemicals; they can do more harm than good, causing the plastic to weaken over time.
For those with hard water, I highly recommend using a water softener or a showerhead filter. This can drastically reduce the buildup of minerals that lead to frustrating, hard-to-remove limescale.
Preventing Future Yellowing and Staining
Preventing yellowing and staining goes beyond just regular cleaning. The environment your bathtub is in plays a huge role as well. Ensure your bathroom is well-ventilated. Moisture buildup can lead to mildew, which not only affects the color of your tub but poses health risks as well.
Consider using a bath mat or a non-slip applique on the floor of the tub instead of rubber mats, which can leave yellow stains over time. If you use bath oils or hair dyes, rinse the tub immediately after use to prevent any potential staining.
Another tip is to occasionally leave your bathroom door or window open (if privacy allows), especially after a shower. This helps with air circulation and reduces humidity, which in turn helps prevent the buildup of mildew and keeps the tub looking white and fresh.
Selecting Appropriate Cleaning Tools
Non-Abrasive Tools for Safe Cleaning
When it comes to getting a plastic bathtub white again, the tools I use are just as important as the cleaning solutions. I’ve learned through trial and error that selecting non-abrasive tools for cleaning is crucial to avoid scratching or damaging the bathtub’s surface.
The first go-to tool in my cleaning arsenal is a soft sponge. Not all sponges are created equal, so I make sure to use ones labeled non-abrasive. These sponges are gentle enough to be used on plastic surfaces without leaving behind scratches. For areas that need a bit more elbow grease, I opt for a soft-bristled brush. These brushes are fantastic for tackling tougher stains without compromising the integrity of the bathtub’s surface.
Another indispensable tool is microfiber cloths. They’re not only super absorbent but are gentle on all surfaces, making them perfect for the final rinse and wipe-down. Microfiber cloths ensure I’m not introducing more scratches as I dry the tub.
Given the sensitive nature of plastic bathtubs, it’s also essential to steer clear of steel wool or any metal-bristled brushes. These are far too harsh and can leave permanent marks on the tub. Instead, when faced with stubborn stains that won’t budge with a sponge or soft-bristled brush, I turn to cleaning pastes that can do the heavy lifting without the need for hard scrubbing.
Remembering these tool choices can make a significant difference in the maintenance and appearance of a plastic bathtub. By pairing the right non-abrasive tools with effective cleaning solutions, I find it much easier to keep the tub looking bright, clean, and white without risking any damage.
Troubleshooting Common Bathtub Cleaning Challenges
In my journey to make my plastic bathtub shine like new, I’ve encountered my fair share of cleaning challenges. It’s not always as straightforward as I’d hope. Through trial and error, I’ve gathered some wisdom on tackling the most stubborn issues. Let me share what I’ve learned about dealing with hard water spots and rust stains—two particularly pesky adversaries.
Dealing with Hard Water Spots and Rust Stains
Hard water spots and rust stains can be the bane of any bathtub’s existence, plastic or not. These spots are notably tricky because they’re not just on the surface; they bond with it, making them harder to remove than your typical dirt or grime. Plus, they can give your tub an unwelcome, aged look that’s less than appealing. But fear not; I’ve found some effective ways to deal with these culprits.
Hard Water Spots: These are mainly due to the minerals in hard water, like calcium and magnesium. They leave behind a residue that not only looks unsightly but can also feel rough to the touch. My go-to solution? Vinegar. It’s natural, safe, and acidic enough to break down these minerals. I simply spray white vinegar on the affected areas, let it sit for about 20 minutes, then wipe it down with a soft sponge. For tougher spots, a repeat application or a bit of gentle scrubbing may be necessary.
Rust Stains: Rust stains often occur from prolonged exposure to metal objects and are more challenging to remove. My secret weapon here is a paste made of lemon juice and salt. The acidity of the lemon juice works to break down the rust, while the salt acts as a mild abrasive to help scrub the stain away. I apply the paste, leave it on for about 30 minutes, then use a soft-bristled brush to scrub gently. Rinse thoroughly with warm water, and voilà!
Remember, regular maintenance is key. Addressing these spots and stains as soon as they appear can prevent them from setting in too deeply. Also, always spot-test any cleaning solution on a small, inconspicuous area of your bathtub first to ensure it doesn’t cause any damage.
Conclusion
Bringing your plastic bathtub back to its original white shine doesn’t have to be a daunting task. With the right approach and a bit of elbow grease, those hard water spots and rust stains will be a thing of the past. Remember, it’s all about sticking to a regular maintenance routine and being gentle with your cleaning methods. Don’t forget to spot-test any solution you’re unsure about to keep your tub looking its best. Here’s to a sparkling, clean bathroom that feels just as inviting as it looks!
FAQ – Frequently Asked Questions
How do you clean a discolored bathtub?
To address discoloration, combine dishwashing detergent with apple or wine vinegar and baking soda to form a thick paste. Apply this mixture evenly across the bathtub with a flat-bristled brush, focusing on discolored areas to restore the tub’s original color.
Can you restore an acrylic tub?
Yes, refinishing an acrylic bathtub is a viable solution for tubs that appear dull, damaged, or if you’re looking to change its color. Professional acrylic tub refinishing can rejuvenate your bathtub, making it look new again at a significantly lower cost and usually completed in one day.